
H3D Tutorials
Popular Tutorials














Tutorials
-
 This tutorial is for advanced Maya users to provide an alternative to the standard facial setup using blend shapes. I find that blend shapes are good for simple setups, but making all of those shapes gets tedious after a while and using the same shapes over and over can begin to look, well, "comp...
 -
Outline This small procedure measures the distance in between two transforms. In this particular case two individual particles, but with the same workflow can be used for say for joints or locators. You could use the information this procedure provides to make your particles �do� something. Say ...
-
I am working on another project for BigBoy Productions and I needed a realistic gold texture with proper reflections but which doesn�t take eons to render. Years ago I once was very close to photorealistic gold but unfortunately forgot a big deal about it. After playing around for days I hav...
-
I real life, you don't have to worry about fingers passing through objects in order to pick them up. The density of your hand is sufficiently large enough to cause friction when you hand collides with other pieces of solid matter, thereby allowing you to grab hold of something and not letting it ...
-
 This is one of my Maya mini tutorials for beginners with, maybe, insights for pros... Can a Ramp Cut? Of course, it can! And this is how it works... Before we can cut a NURBS cylinder into two we need to create one. Right Mouse Button: Mat...
 -
This tutorial goes through in detail the UV texture mapping process in maya
-
 Multipass Rendering : Quick Tutorial by Tahl Niran. Introduction Most people know that you can get the best results from outputting multiple passes from your 3d app and then tweaking these in 2d. What I have put together is a simple breakdown of a setup which will allow you a lot of control i...
 -
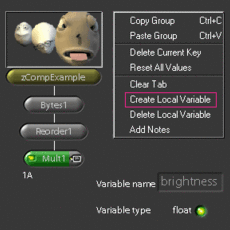 Z composite with IFF in Shake Utilizing the Z channel (depth information) of Maya's IFF files in Shake is a bit tricky because of the way Maya stores depth information... here's a quick tutorial to get you started. Note that this tutorial is applicable on not only Maya's IFF files but also...
 -
 Subsurface what?!? - Don't freak out! 'Subsurface scattering' is the term used in 3D graphics to describe the effect we see when, in the real world, light enters a surface (at least to some degree), bounces around a bit and is then either absorbed or reflected back out again. The e...
 -
Raytrace Shadows with Transparent Texture Files
-
Creating Clouds in Maya using Particle Clouds
-
 This tutorial is intended to describe some basic ideas about normal mapping and how to implement this technique in Maya. Normal mapping is the technique to replace the existing normals on model. It can be used to greatly enhance the appearance of a low poly model without using more polygons...
 -
 In this small tutorial, I will try to demonstrate the easy use and flexibility of TEXPORTER, (free plugin) with two simple planar maps, an alternative for who doesn't want to spend a long time "sewing" unwraps. You will know one of the simplest and most effective ways of mapping an object. For th...
 -
 I'm posting a very simple tutorial on how to model and apply shaders to get realistic eyes, the "windows of your character's soul". A lot of times, bad eyes can "kill" your character literally, even if it has the most perfect modeling of the world. The importance of the eyes is exactly this: give...
 -
 Translation thanx to Mihai Pocorschi III - www.antena1.ro. This tutorial is mainly aimed at those users with experience in polygon modeling. Poly-by-poly is a modeling technique that involves constructing the polygons one by one, aiming at drawing the "edge-loops" of the object, similar to spli...
 -
 Introduction It is very rare to find perfect hard edges in the real world even on the hardest surfaces around. Actually it is something not desirable (imagine a building with a corner as sharp as a blade� yikes!). However, most 3D images are made of discrete polygons that have no sense of humor. ...
 -
 there are too much ways to create realistic fire,(fluid,particle etc....) but I like partcile,because it is so fast,so that I can get more interactive control. 1.create a emiter (or emit from other object ). 2.set rate 6000 3.add gravity and turbulence field ...
 -
 Using Blend Shape for Facial Expressions In this file we will go over using blend shape for facial expressions. This is an extremely easy and effective way to enhance you animations. First we want to duplicate the mouse once for each expression or partial expression you want. (Fig. 1.) This...
 -
 Light Linking using three point lighting: Light linking is the art of using multiple lights to create the illusion of one. I normally start with a three point lighting scheme (which I will cover later) and then add lights were needed. Linking a light to an object or objects will allow you ...
 -
 Texturing Polygons UV Mapping and using Photoshop to create textures �Some excerpts and definitions used were taken from the help section in Maya.� There are many different ways to create textures for polygon models. The way I will show you may not be the correct way to do this, but ...
 -
 This article was printed in the 1998 siggraph issue of 3D Design magazine, for an article Alex Alvarez wrote entitled 'Organic Modeling and Animation in Maya V.1', Alex is director and instructor at Gnomon Training Center, a HIGHEND3D.COM strategic partner. Alex teaches advanced acharacter nimat...
 -
By Eric Keller This tutorial will demonstrate some ways in which you can use the new per particle goal attributes introduce in Maya 7. Traditionally goals are away to move particles about the scene, much like fields. However, the techniques discussed here will use goals to get information abou...
-
 We all know Shake rocks, but anyone who's used the RotoShape tool is left wondering why they have a keyframing toolset so basic, it cana ctually make you cry. This technique outlined below is used to hide a shapes keyframes within RotoShape, preferably after you're done keying it. It may be a bu...
 -
 paul@paraform.com pthuriot@hotmail.com INTRODUCTION There�s only one thing you need to remember as you go through this tutorial: there�s no �one way� to setup a character for digital animation�this way just generally works for me�! Every animator/ studio is going to have thei...
 -
 Hi, welcome back to my tutorial. This time I am going to show you how I setup bone for the dragon in the ready to animate way. Before I write this article, I've been completed a shot animated sequence of the dragon. A lot of mistake I've made during the setup, bind skin and IK. Most of the mistak...
Page 12 of 17